Montana Drywall Installation and Finishing: A Homeowner’s Guide
Drywall, Tape, and Texture: What Makes a Clean Interior Finish
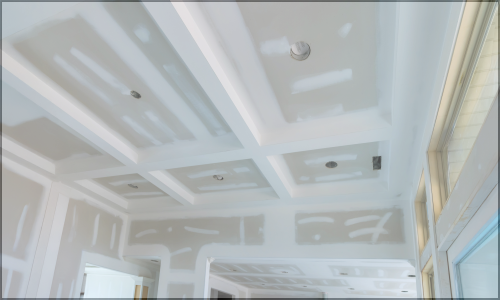
Drywall is one of the biggest parts of a finished interior. It shapes the walls and ceilings, sets the stage for paint, and has a major impact on how clean and complete a room feels. When drywall, tape, and texture are done well, the finished space looks smooth, consistent, and professionally built.
For homeowners planning a remodel, addition, basement finish, or new build, drywall work is more than just covering studs. It is a process that includes proper drywall sheet/panel installation, clean taping, careful mud work, sanding, texture, and final surface preparation.
Why Drywall Work Matters
Drywall creates the finished surfaces you see every day. Poor drywall work can lead to visible seams, screw pop/nail pop, uneven corners, cracks, rough texture, and paint that does not look right. Even small mistakes can stand out once light hits the wall.
A clean interior finish starts with good installation. If the drywall panels are not hung correctly, the tape and texture process becomes harder. Straight panels, tight seams, and properly set fasteners make the entire finish look better.
Drywall Installation
The first step is hanging the drywall panels. They should be measured, cut, and fitted cleanly around doors, windows, outlets, ceilings, and corners. Fasteners should be set just below the surface without tearing the paper.
Good drywall installation also means thinking ahead. Where seams land matters. Reducing unnecessary joints and keeping sheets aligned helps prevent visible seams after finishing. The cleaner the drywall is hung, the cleaner the finished wall will be.
Drywall Taping
After the panels are installed, the seams are taped. Tape strengthens the joints between drywall panels and helps prevent cracking. It is embedded in joint compound, then covered with additional coats to blend the seam into the wall.
Drywall tape must be set correctly. If it is too dry, poorly embedded, or uneven, it can bubble, lift, or show through the finished surface. Clean taping creates the base for a smooth wall and makes the texture look more consistent.
Mud Work and Joint Compound
Joint compound, often called mud, is used to cover seams, fasteners, corners, and tape. It is applied in thin layers, with each coat spread wider than the last. The goal is to feather the compound so the joint disappears into the wall.
Good mud work takes patience. Too much joint compound creates heavy ridges and extra sanding. Too little compound can leave seams visible. A clean finish comes from applying the right amount, letting each coat dry, and sanding between coats when needed.
Texture Application
Texture gives drywall its final surface appearance before paint. It can help create a consistent look across walls and ceilings, while also hiding minor surface imperfections. The type of texture used depends on the style of the home and the look the homeowner wants.
Common drywall textures include orange peel, knockdown, skip trowel, and smooth finish. A smooth finish requires more detailed prep because imperfections are easier to see. Textured finishes still require quality taping and mud work underneath, because texture will not hide major flaws.
Texture should be applied evenly across the surface. Uneven texture, heavy spots, thin spots, or mismatched repairs can stand out after painting. Matching existing texture during remodels or repairs takes experience and a careful eye.
Sanding and Surface Prep
Before texture or paint, the drywall surface needs to be sanded and checked. Sanding smooths ridges, edges, and tool marks left from the joint compound. The goal is to create a clean surface without damaging the drywall paper.
Good finishers inspect walls under varying lighting conditions. Side lighting can reveal seams, waves, scratches, or rough areas that are easy to miss. Taking the time to correct these details before texture and paint leads to a better final result.
Primer and Paint Readiness
Once drywall, tape, and texture are complete, the surface should be clean, dry, and ready for primer. Primer helps seal the drywall and joint compound so that paint absorbs evenly. It also helps reduce flashing, where some areas look dull while others look shiny.
Paint does not cover poor drywall work. In many cases, it makes flaws easier to see. That is why the drywall process matters so much before the first coat of paint is applied.
What Makes a Clean Drywall, Tape, and Texture Finish?
A clean finish comes from doing every step correctly.
- The drywall needs to be hung straight.
- The seams need to be taped properly.
- The mud needs to be feathered smoothly.
- The texture needs to be applied evenly.
When the process is done right, walls and ceilings look consistent, clean, and ready for the final details of the project.
Why Choose Martin Construction for Drywall, Tape, and Texture
Martin Construction provides dependable construction and remodeling services, including drywall installation, tape, and texture for homes and buildings across Montana. Whether you are remodeling a kitchen or bathroom, finishing a basement, repairing damaged walls, or completing a custom build, quality drywall work helps bring the entire project together.
A clean interior finish is about more than appearance. It shows the care, skill, and attention to detail that went into the project from start to finish.
FAQ Section
What is the difference between drywall, tape, and texture?
Drywall is the panel material used to create interior walls and ceilings. Tape is used to cover and strengthen the seams between panels. Texture is the final surface finish applied before painting to create a consistent look.
Why does drywall need to be taped?
Drywall needs to be taped because the seams between panels can crack or show through if they are not properly covered. Tape helps strengthen the joints and creates a smoother surface for mud, texture, primer, and paint.
What does drywall mud do?
Drywall mud, also called joint compound, is used to cover seams, tape, screw holes, corners, and small imperfections. It is applied in layers and sanded smooth before texture or paint.
Can texture hide bad drywall work?
Texture can help hide small surface imperfections, but it will not cover poor drywall installation, raised seams, bad taping, or uneven mud work. A clean texture finish still depends on good drywall prep underneath.
What are common drywall texture options?
Common drywall texture options include orange peel, knockdown, skip trowel, and smooth finish. The best option depends on the style of the home, the room, and whether the goal is a modern, smooth look or a more traditional textured finish.
How long does drywall finishing take?
Drywall finishing time depends on the size of the project, the number of coats needed, drying time, sanding, and texture application. Smaller repairs may take a short time, while full rooms, remodels, basements, and new builds can take several days or more.
Why do drywall seams show after painting?
Drywall seams can show after painting if the tape was not embedded correctly, the joint compound was not feathered out enough, the surface was not sanded well, or primer was skipped. Lighting and darker paint colors can also make seams more noticeable.
Do walls need primer after drywall texture?
Yes. Primer helps seal the drywall, joint compound, and texture so that paint absorbs evenly. Without primer, the finished wall may have uneven sheen, flashing, or visible surface differences.
Sources
Drywall Mud and Joint Compound